banner

Saturday, August 16, 2008

Sandwich Loaf Bread Recipes on A Year in Bread

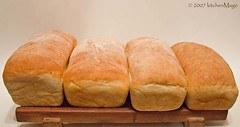
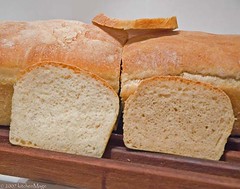
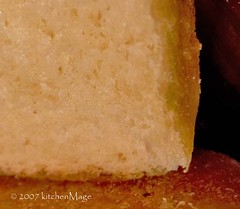
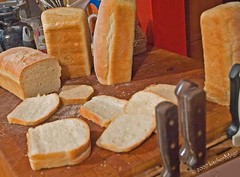
Susan's Farmhouse White - A Classic Sandwich Loaf

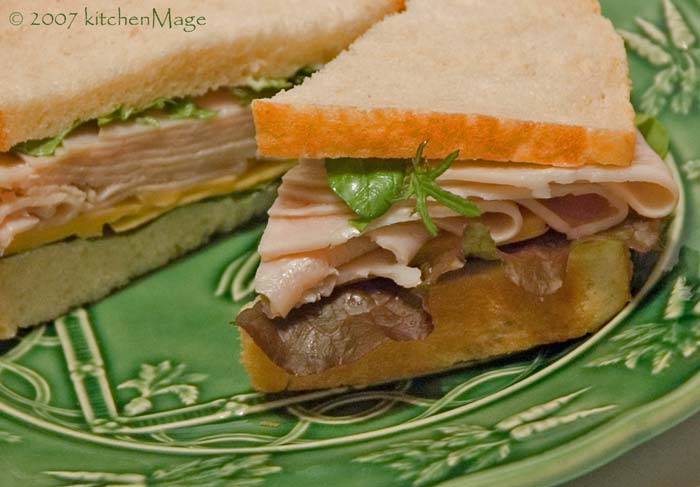
Welcome new visitors and hello old friends! Just in time for back-to-school, here are links to all the sandwich bread recipes we've posted so far on A Year in Bread. What could be better than sending your kids (or yourself!) off for the day with a lunch that includes a scrumptious sandwich made on homemade bread? We certainly can't think of anything.

But what, you ask, about new recipes, promised recipes, and the fact that nothing whatsoever has been happening around here lately? Well, Beth and I have been dreaming and scheming, plotting and planning - and baking of course! - and should hopefully be back to posting regularly again soon. (I know, I know, you've heard this from us before, but this time we really mean it. I hope.)

In the meantime, why not try some of these breads out and let us know what you think. Don't forget to check the comments section of each post for answers to questions about the recipes and responses from other bakers.

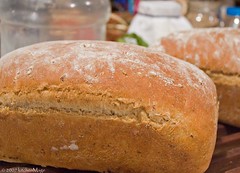
Susan's Farmhouse White (for the quintessential BLT or PBJ)
Beth's Potato Bread (certified kid-friendly)
Kevin's Sour Cream Bread (wonderfully rich)
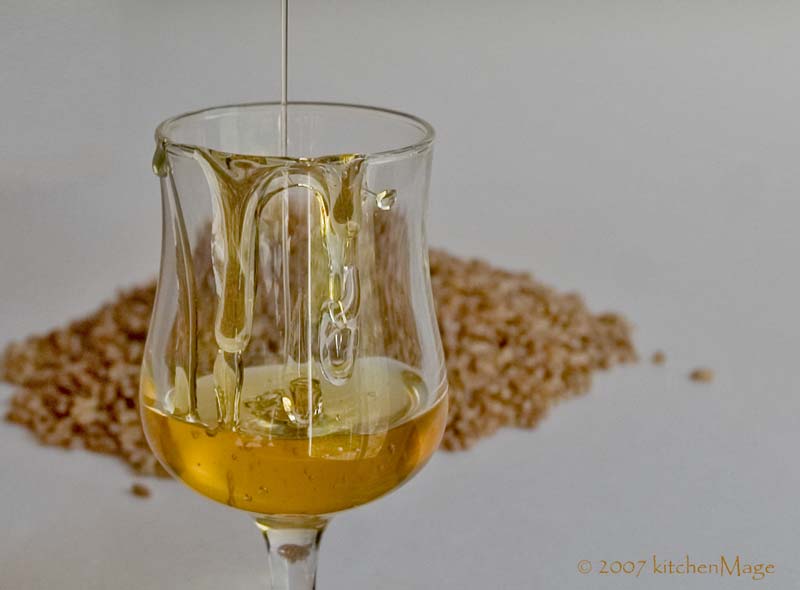
Beth's Honey wheatBerry Bread (miles above the storebought version)
Susan's Whole Grain Cottage Cheese Bread (good tasting and good for you)
Kevin's Sandwich Rye (hello, Reuben!)

Bored by perfectly shaped slices? These freeform loaves can all make heavenly sandwich fare:
Parisian Daily Baguettes (ready to devour in under 4 hours)
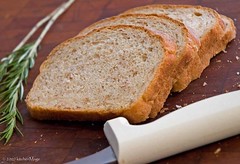
Italian Rosemary Raisin Bread (I love it toasted and topped with sharp cheddar & apricot jam)
Susan's No Knead Italiano Bread (great for grilled cheese)

Still not sandwich satisfied?
Beth says her Onion Cheddar Breadsticks dough makes "absolutely great loaves. Just divide in half and shape into loaves instead of breadsticks." And my Oatmeal Toasting Bread has received rave reviews both on and offline. Have a sweet tooth? Don't miss Beth's Cinnamon Spice Pecan Swirl version.

© Copyright 2008 AYearInBread.com, the bread baking blog where we know that a sandwich makes a meal, and bread makes the sandwich.

Labels:

Click here to continue reading the post and comments...

Thursday, September 27, 2007

Kevin: Sandwich Rye Bread Recipe

Sandwich Rye

A few years ago I made a sourdough rye bread using wild yeast that I captured and cultured. I made a decent bread from it, albeit rather tough and coarse, but I already had a sourdough culture I was caring for and decided I didn't need twins in my life. Nevertheless, I do love a good sour rye bread for sandwiches and so I eventually got around to coming up with a good sandwich rye.

The trick with rye bread is that rye is low in glutenin. Gluten is a combination of two primary protein molecules, glutenin and gliadin. Glutenin provides stretchability and gliadin provides plasticity. In the presence of water, glutenin in particular can bind to other glutenin molecules at each end (forming even longer chains) and to other molecules in the center. By kneading dough you encourage the glutenin molecules to make these links and thus you get bread dough's ability to rise. Gliadin molecules, in turn, enable the glutenin to maintain it's shape. This combination of glutenin and gliadin is what we usually mean by the single word "gluten."

A couple of other key factors affect the way bread rises. Acid weakens the gluten bonds, which is why sourdoughs are often denser breads than yeast breads. On the other hand, salt strengthens the bonds.

Because rye flour is low in glutenin it doesn't stretch well and so pure rye bread tends to be dense and heavy — and sourdough rye particularly so. This means that to make a good sandwich-type bread with an open, generous crumb using rye the rye needs to be an ingredient rather than the primary flour.

I did some research and found a bread machine recipe that I decided to adapt. Based on what I knew and what I desired I came up with the following recipe.

This is the least pure recipe I've made, by which I mean that I include a couple of additives in the bread: sour salt and wheat gluten. Both of these are natural products — or at least occur naturally.

Click to enlarge.

Sour salt is actually citric acid, which is the acid found in lemons, limes, and other citrus fruits. I like a slightly acid flavor in rye because it complements both the rye flavor and the caraway seeds that, to me, are essential in a good sandwich rye. You could simply add lemon or lime juice but I didn't want the flavors associated with the juice, instead I wanted the pure taste of acid on the tongue. Wheat gluten is what it says, gluten extracted from wheat (ideally without any melamine, so stay away from Chinese wheat gluten). The wheat gluten would enable me to bump the proportion of rye flour and still get a good sandwich loaf.

Sandwich Rye
Makes 1 loaf.

Ingredient US volume Metric Volume US weight Metric weight
rye flour 1 c 235 ml 5 1/8 oz 146 g
bread flour 2 1/4 c 530 ml 11 1/2 oz 330
instant yeast 1 tsp 5 ml -- --
wheat gluten 1 1/2 tbsp 22 ml -- --
citric acid (sour salt) 1/4 tsp 1 ml -- --
caraway seeds 2 tbsp 30 ml -- --
molasses 1 1/2 tbsp 22 ml -- --
butter melted 1 tbsp 15 ml -- --
table salt 3/4 tsp 4 ml -- --
water 1 c + 2 tbsp 2.6 dl 9 oz 256 g
Egg Wash:
egg 1 -- -- --
water 1 tbsp 15 ml -- --

In the bowl of a stand mixer using the paddle attachment, mix together the yeast, gluten, citric acid, caraway seeds, rye flour, and 2 cups (530 ml) of bread flour. Add salt and mix in. (Note, the salt is added after mixing the original ingredients to minimize it's direct contact with the yeast, which it can kill).

In a measuring cup, mix together water, molasses, and butter using a small whisk. With the motor running at low speed, pour liquid into dry ingredients. Once moistened, switch to the dough hook and finish blending. The dough should be moist and sticky, add just enough additional flour, a tablespoon at a time, to have dough clear the sides of the bowl. Increase speed to medium and knead for eight minutes. (Note, dough will clear sides but stick to bottom, scrape it up with a rubber spatula every couple of minutes.)

Scoop dough onto a lightly floured surface and knead lightly a few times then form into a ball. Place the dough in a bowl sprayed with cooking oil, spritz top with oil, and cover tightly with plastic wrap. Allow to rise until doubled in bulk — about 1 1/2 hours.

Gently deflate dough, scoop onto a lightly floured surface, fold a few times, and allow to relax for about five minutes. Shape dough into a loaf and place on a piece of parchment on your peel or on a baking sheet. Lightly spritz tops with oil and cover with plastic. Allow to rise until doubled in size, about 1 hour. In the meantime, heat oven to 400F (200C) and place rack in center position. (Note: it's important to give the oven a long preheat before baking, particularly if you're using a baking stone.)

Whisk together egg and 1 tablespoon of water in a small bowl. Brush loaf with egg wash and bake for 15 minutes. Rotate rack front to back and continue baking 15 to 20 minutes until golden brown. The interior should read 190F on an instant read thermometer.
The bread makes a great ham sandwich. And I've made buns for bratwursts using it — a perfect flavor match for the brats with a dollop of mustard and some onions and peppers.

Technorati:

Labels: , , ,

Click here to continue reading the post and comments...

Saturday, September 22, 2007

Beth: Honey wheatBerry Bread Recipe

honey 'n wheatBerries

He’s as sweet as Skamokawa honey
Just like honey from the bee.
Tupelo Honey, with apologies to Van Morrison

Sometimes it is, as the kids say, all about the boy.

We all know people who have done odd things for love: run up multi-thousand phone bills, changed names and careers, moved to a city they would never have considered otherwise, or tried to replicate a mass-market loaf of bread.

Um, yeah.

Although Kevin once referred to me as one of the technicians here, I am truly a member of the magical improvisation class – hence the kitchenMage name. It’s just that I study theory natively and, having been in the kitchen since I was tippy-toe to a flour bin, I have learned many aspects of theory well enough to look technical even while making it up as I go along. (note to kids: this is a handy skill, useful in many areas of life: cultivate it)

Sure, I use recipes... every now and then. Sometimes I even use the same amount of the various ingredients as the person who wrote the book. Not always, though — I often use recipes only to provide a rough outline, which I gleefully color outside of. Truth be told, I have had to force discipline on myself to solidify a recipe long enough to post it here.

As you might imagine, I am not a huge fan of deconstructed "famous recipes." I am not likely to buy most prepackaged food, why on earth would I want to go to the effort of creating my very own homemade version of that stuff?

But then there was the boy.

This person, who shall remain 'nymless, was raised on Oroweat Honey Wheat Berry Bread, developing a deep and abiding affection for the stuff. I can see why: as commercial sandwich loaves go, it's pretty good. Dense but not heavy, a hint of sweetness and a rich taste of grain, it is particularly good toasted with a smear of butter and honey. So while it just kills me to pay three bucks a loaf for sandwich bread, I did. For quite a few years.

loaf of wheat berry breadThen Oroweat started making a fluffier version — wider slices, a bit more yeast, lighter color and flavor. Sold it in two-packs at Costco at a fairly reasonable price. Just one problem: it tastes like cheap, fluffy bread you buy in two-packs.

Now the old stuff — the good stuff — is hard to find and closer to $4 a loaf when you can lay hands on it. Clearly, something had to be done and about five years ago, I decided to. That's a long time to work on a single recipe, but it was worth it.

There is, after all, the boy. And he likes it.

kitchenMage’s Honey wheatBerry Bread
This recipe makes two large (slightly over 2 pound) loaves or ~18
US Volume metric Volume US Weight metric Weight
water 3 cups 800 ml 24 ounces 675 grams
Wheat berries 3/4 cup 175 ml 5 ounces 140 grams
Milk, room temp 3/4 cup 175 ml 6 ounces 170 grams
Whole wheat flour 1 cup 235 ml 4 1/2 ounces 125 grams
instant yeast 1 tablespoon 15 ml 3/8 ounce 12 grams
Honey 1/4 cup 60 ml 3 ounces 84 grams
Butter 1/4 cup 60 ml 2 ounce 56 grams
Bread flour 6 1/2 cups 1525 ml 29 1/4 ounces 820 grams
salt 1 tablespoon 15 ml 1/2 ounce 15 grams

Note: Each batch of wheat berries I get seems to cook in a different amount of time and absorb a different amount of water. This means that, more than many bread recipes, you may need to adjust the flour on this each time you make it. I add ~5 cups to start and then sprinkle more in as it mixes in the kitchenAid. Most of the time, I end up using ~6 1/2-7 cups, but your mileage, as always, may vary.

Preparing the wheat berries
Combine wheat berries and 3 cups of water in a medium sauce pan. Cover and set aside to soak for an hour. After an hour, leave pan covered and cook on medium heat, stirring occasionally, until wheat berries are soft and popping open. The water level will be reduced by ~1/2 cup and the wheat berries will be fat and soft. Let cool and prepare for use in dough — see sidebar for more information.

Do you like your wheat berries smooth or chunky?

There are two distinctive states of wheat berries: smooth and chunky. You need to decide which form you want your wheat berries to take and prepare them differently based on your desired results.

On one end of the continuum, there is the nuts-and-seeds style of bread, with fairly intact wheat berries. While I like this effect occasionally, particularly when making rolls (add a smidge more yeast, too), the berries have a tendency to stick out of the dough and aren't what I usually want from this bread.

Totally opposite this is the Oroweat bread that set me on this quest. This bread, oddly enough, has no discernible wheat berries, something which I always attributed to superior industrial wheat berry smooshing technology — I think I pictured something involving oompa loompas — but now I know the truth. There are no wheat berries in their bread! In fact, the first ingredient is cracked wheat! Go figure.

Lacking superior oompa-loompa based technology, the easiest way I have found to smoosh these babies is with an immersion blender. A regular blender works reasonably well, but I was less impressed with the results from the food processor.
In any case, let the cooked wheat berries cool to body temperature, ~100F (38C) and then smoosh, or not, to your heart’s content.

Mixing the dough
In mixing bowl, combine wheat berries, milk, yeast and whole wheat flour. Mix until well combined, cover and set in a warm spot until bubbly, 20 - 30 minutes.

Add the softened butter, honey and 5 1/2 cups of bread flour. Mix until it forms a shaggy mass. Continue to add flour, a tablespoon or two (or more at first), until the dough stops readily absorbing it. Mix for another minute, two if mixing by hand. The dough will still be a bit rough. Cover and let rest on the counter for 20 minutes.

If you are using a mixer: Add salt. Use the dough hook and mix it on medium for ~5 minutes, adding more flour a tablespoonful at a time, if needed, until the dough is fairly smooth. Turn it out on a well-floured counter and knead for a few minutes, until the dough is like a baby's bottom — given the wheat berries, perhaps it’s a baby with diaper rash. (sorry)

If you are making the dough by hand: Add salt. Spread a cup of flour on the counter and knead for 4 - 5 minutes, adding more flour if needed. Knead until the dough is, um, ready as described, perhaps a bit too graphically, above.

sliced wheat berry breadRoll the dough in flour, put it in a clean bowl, cover and let rise until doubled in bulk (about an hour).

Turn the dough out on a lightly floured counter, divide in half and shape into loaves. Grease two loaf pans. Put the shaped loaves in the pans and let rise until doubled in bulk (about an hour).

Preheat oven to 375F (175C). Bake bread for 45 minutes or until golden brown (~195F/90C internal temperature). Turn out of pans onto cooling rack for at least an hour.

Complete flickr set of kitchenMage's Honey wheatBerry Bread

Technorati:

Labels: , , ,

Click here to continue reading the post and comments...

Thursday, May 31, 2007

Beth: Potato Bread

potato bread sandwich


When theKid was a young'un, I faced a challenge that I am sure is common to parental units across the country: white bread lust.

For reasons perhaps best explained by marketing, a lot of kids — even those who usually make sane food choices—seem to prefer bland, white bread. Sandwiches, toast, pretty much anything has to be white bread, but especially sandwiches. And kids eat lots of sandwiches. (hmmm, kids, sandwiches, Kevin, sandwiches... interesting....) Not very healthy and awfully boring. The white bread — not Kevin!

potato bread array

Then there was the cost of a decent loaf of white bread, which was simply exorbitant. Yet, even as a single mother on a tight budget, the affordable white bread in the shiny primary-color dotted bag was just too awful to contemplate. (The only thing I ever Wondered was who was buying that stuff!)

Whole Wheat Potato Bread

Potatoes have many positive effects on bread: yeast loves it, bread is softer and stays fresh longer, and bread dough with potatoes does not have to be mixed as long as bread without potatoes—amazing but apparently true! One of the more useful effects however, is an increased tolerance for whole wheat flour in the dough.

I used two cups of white whole wheat in one of my experiments and, with a few minor adjustments, I think this recipe would do nicely for anyone who wants a whole wheat take on this bread. As with all of bread baking, pay attention to the feel of the dough and adjust the ingredients where they seem to need it. Here is what you need to do differently, and why:

New first step: Mix the water, white whole wheat flour and yeast, cover and let it sit for ten minutes. This insures that the heavier whole wheat flour is totally hydrated before you start mixing the rest of the dough.

The white whole wheat flour absorbs more water, so add a little. I'd suggest a quarter of a cup. You may need to add a bit more when you are adding the rest of the flour, if it seems too dry to absorb all of it.

Let the bread proof until it is actually doubled in bulk. As you can see from the photo of the side by side white and white whole wheat loaves, I underproofed mine a bit. (I was nervous about it falling and it looked done. Oh well, live and learn.)

You can probably substitute more white whole wheat for white, although at some point you might need to add a little more yeast or a tablespoon of gluten if you have it around. The potatoes make this dough pretty forgiving.

Having sandwich bread that I was willing to eat, let alone feed theKid, meant making it myself. Fortunately, I knew how to do this, although, since I'd rather have my sandwich on a roll, standard loaves weren't in heavy rotation before then. Another saving grace was that theKid was not old enough to have kids at school telling her that homemade bread was, like homemade clothes, 'uncool.' Lacking a freezer to store a second loaf meant that I usually had to bake more than once a week, usually with the help of a toddler standing on a five gallon bucket of flour. Good times.

I started sneaking in bits of leftover cooked cereal, mashed potatoes, rice, and other things that seemed to have a complementary flavor and texture. This was surprisingly effective and had the bonus of helping me cut down on wasted food, which mattered a lot on my very tight budget.

sliced potato bread


Potato bread—soft, almost billowy, yet chewy enough to have some substance—was one of my favorites. Fresh herbs add a lovely depth to the flavor; rosemary and thyme are particularly good. This also makes wonderful dinner rolls; I like them with soup because they hold together well when dipping.

These days, I only bake bread for theKid when she makes the trek from theCity to evenTinierTown and it's been a long time since I had to sneak anything into her bread. I still love potato bread, though, and since I can never seem to make the right amount of mashed potatoes it's something I can make fairly regularly.

kitchenMage's Potato Bread
water | 2 cups | 475 ml | 16 ounces | 450 grams
bread flour | 5 1/2 cups | 1070 ml | 20 1/4 ounces | 570 grams
instant yeast | 2 teaspoons | 12 ml | 1/4 ounce | 7 grams
mashed potatoes | 1 1/4 cup | 350 ml | 8 ounces | 225 grams
butter | 2 tablespoons | 30 ml | 1 ounce | 28 grams
all purpose flour | 1 cup | 235 ml | 4 1/2 ounces | 125 grams
salt | 1 tablespoon | 15 ml | 1/2 ounces | 15 grams
Notes:
I based this recipe on mashed boiled potatoes with nothing added and used the water from the potatoes in the bread. If you want to do this, measure the water and raw potatoes then cook. When the potatoes are done, do not drain them, just mash them in the water. Then measure the mixture again and if it's not quite the same, add water until it is.

If you are using leftover mashed potato, you will probably need to add a little extra flour to make up for additions to the potatoes, such as milk or butter. You will have to judge this when you are making it.

In mixing bowl, combine water, potatoes, yeast and flour and mix until well combined. Add the butter and mix until it is integrated into dough. The dough will still be very soft. Cover and let rest on the counter for 20 minutes.

Add the salt to the dough when you do the next step.

If you are using a mixer: Use the dough hook and mix it on medium while you sprinkle in the all-purpose flour a tablespoonful at a time. When the absorption of the flour starts to slow down, turn it out on a well-floured counter and knead until the dough is smooth and supple, but no longer tacky.

potato bread

If you are making the dough by hand: Spread the cup of all-purpose flour on the counter and knead for 4-5 minutes, adding more flour if needed. Knead until the dough is, as Kevin would say, smooth as a baby's...um, never mind, we got labeled as an adult site by one of those net-filtering software things because I said "bread p**n" once. Geez.

Roll the dough in flour, put it in a clean bowl, cover and let rise until doubled in bulk (about an hour).

Turn the dough out on a lightly floured counter, divide in half and shape into loaves. Grease two loaf pans. Put the shaped loaves in the pans and let rise until doubled in bulk (about an hour).

Preheat oven to 375°f / 175°c. Bake bread for 35 minutes or until golden brown (~195°f / 90°c internal temperature). Turn out of pans onto cooling rack for at least an hour.

truth in blogging


This last picture? Just a bit of truth in blogging. Just in case we put up a convincing front that it is all we just make a recipe up in fifteen minutes and bake one loaf and it is perfect and our kitchens are always clean. As if!


Technorati: | | | | | <| | | |

Labels: , , ,

Click here to continue reading the post and comments...

Thursday, May 24, 2007

Kevin: Basic White Bread


I've said before, and I'll repeat it here, I enjoy baking bread more than I enjoy eating it. I like bread, and I certainly appreciate good bread, I'm just not a huge bread eater — with one caveat. I'm a sandwich fanatic. In fact, Beth has occasionally referred to me as Pig Sandwich Boy in reference to my dual loves of pork and sandwiches.

There's a Web site named I Love Sandwiches that once had a poll on it asking what's the most amount of time you've ever devoted to making a sandwich? My answer was 36 hours. It took that long because it began with making a poolish from my sourdough starter and proceeded in due course to making the bread, allowing it to rise twice, baking it, and then letting it cool enough to slice for sandwiches. My friends, the true mark of a sandwich lover is when they begin by making the bread for the sandwich.

"There is an art to the business of making sandwiches which is given to few ever to find the time to explore in depth. It is simple task but the opportunities for satisfaction are many and profound…" ~ Douglas Adams, Mostly Harmless

Reputedly the sandwich is named for John Montague, the Fourth Earl of Sandwich. The story goes that he was gambling and rather than take a break from the table to eat he told his servant to bring him a piece of meat between two slices of bread so he could eat with one hand and play cards with the other.

Whether the tale is apocryphal or not, the name does seem to come from him. And I think it holds a key to what truly defines a sandwich: A sandwich is some filling, enclosed in bread, that can be eaten by hand. By this definition a so-called open-faced sandwich is generally not a sandwich because it requires at least a fork to eat. A pizza is not a sandwich, but in terms of utility a calzone is a sandwich just as an empanada or wrap or hamburger is a sandwich.

But whatever the definition, the classic sandwich remains a filling or fillings between two slices of bread. Whether it's a Rueben, a grilled cheese, a ham panini, a cubano, a mufaletta, a Bánh mi a hoagie, a Philly steak and cheese, PB&J, or a BLT they all share a common form and they're all delicious — especially when made with top quality bread.

Click to enlarge

Although sandwiches have a place in every season, they are particularly suited to summer. They're as heavy or light as the maker desires, they're tremendously portable, and they're quick to prepare (at least they are if you've already baked the bread), and almost everyone has a favorite sandwich. That's why when we were planning A Year in Bread we decided to start off the summer with that most basic of sandwich ingredients, white loaf bread.

My favorite recipe is from Beard on Bread by James Beard. It's made with sour cream which adds some tang to the loaf, but mostly produces an open crumb that makes the best damned grilled cheese sandwich you've ever eaten (recipe below). This bread recipe doesn't produce the huge lofty loaves that Susan's Farmhouse White does, but that's an issue of dough quantity and not how the bread rises. Besides, I find the smaller slices such loaves produce easier to make one-handed sandwiches with — which allows me to eat a sandwich with one hand while making my next loaf of bread, or make manageable sandwiches for kids.

Sour Cream Bread
Adapted from a recipe by James Beard.

ingredient US volume | Metric Volume | US weight | Metric
unbleached bread flour 4 1/2 - 5 c | 1050 - 1200 ml | 23 - 26 oz | 650 - 725 g
instant yeast 2 tsp | 10 ml | 1/4 oz | 4 g
granulated sugar 3 tbsp | 45 ml | 2 oz | 32 g
baking soda 1/4 tsp | 1 ml | --| --
salt 2 tsp | 10 ml | 1/2 oz | 8 g
warm water 1/4 c | 60 ml | 2 oz | 56 g
sour cream, at room temperature 2 c | 480 ml | 16 oz | 450 g

Click to enlarge

Thoroughly combine 4 1/2 cups (650 g) of the flour with the yeast, sugar, baking soda, and salt in a bowl. Mix in the sour cream and water. You should have a wet, sticky dough, but you made need to add a bit more flour to make it manageable. Scrape out onto a lightly floured board.

Using a baker's scraper or a spackling knife, lift the flour and the dough, and fold the dough over. Turn it clockwise slightly and repeat the lifting and folding process until the dough is less sticky and can be worked with your hands. Add only enough flour to prevent sticking. (This entire kneading should take about 10 minutes, possibly longer if you are inexperienced). Shape the dough into a ball, place in a buttered bowl, and turn to coat it with the butter. Cover with plastic and let sit in a warm spot to double in bulk. (Note: The mixing and kneading can be done in the bowl of a stand mixer.)

Punch the dough down. Turn onto a lightly floured board and knead for a minute, then divide into two equal pieces. Butter two 9 x 5 x 3-inch loaf tins. Shape the dough into loaves and fit into the tins. Cover loosely and let rise again until doubled. Bake in a preheated 375F (190C) oven for 30 to 35 minutes, or until the loaves sound hollow when tapped on top and bottom. Cool thoroughly before slicing.
It may, perhaps, seem foolish for me to post a recipe for a grilled cheese sandwich — after all you can’t get much simpler. And yet, a truly great grilled cheese is one of the best sandwiches on earth and they don't happen by accident. They are made deliberately with care given not only to the choice of ingredients, but to their proportion and the cooking method.

The Perfect Grilled Cheese

Click to enlarge

Take a loaf of bread with a crumb that's almost cake-like in appearance. In the recipe above the sour cream produces the open pores while the bread flour gives it the firmness it needs. Cut two 3/8 inch slices. I know, I know. Too much precision. But if the bread is too thin the cheese will melt too quickly and if it's too thick the cheese won’t melt quickly enough.

Spread each slice with a light coating of unsalted butter at room temperature.

Place one slice of bread, butter-side down in a cold skillet. Cast iron is best because it heats slowly.

Cut as much sharp cheddar cheese (I highly recommend Grafton Village 1-year- old cheddar but almost any sharp artisanal cheddar will do) into enough 1/8 inch slices to cover the bread. Again, this seems overly precise, but the goal is that the cheese is perfectly melted at exactly the moment the bread is properly browned.

Place the second slice of bread on the cheese and turn the heat to low medium. The bread should start browning in about 6 minutes and should be perfectly browned in 8 - 9 minutes. The cheese will be tacky enough to hold the bread together, but not truly melted. Flip the sandwich and cook until the other side is browned, about 4 minutes, and the cheese is completely melted.

With the right bread and cheese, the bread will actually absorb some of the cheese — a bit may even soak all the way through the bread to contribute to the browning on the second side.
I like to cut the sandwich into two triangles and then eat it with a few pickled peppers and a mug of hard cider. This, my friends, is absolute bliss.

For a collection of sandwich photos, click here.

Technorati: | | | | | | | | |

Labels: , , , ,

Click here to continue reading the post and comments...