Friday Favorites : Kelli's Pain aux Raisins Secs et Noisettes ou Pacanes (Bread with Golden Raisins & Hazelnuts or Pecans) For the People
A one rise, homemade and healthy bread recipe that goes from start to serving in under two hours!

Kelli's Pain aux Raisins Secs et Noisettes ou Pacanes
Welcome to Friday Favorites, where A Year in Bread readers guest blog about their best bread recipes. If you bake a Friday Favorites bread at home, we hope you'll come back and share your experiences with us in the comments section of that post. Click here to find out how you can become a Friday Favorites guest blogger, and click here for last week's Friday Favorites recipe: Marielle's versatile, overnight bread dough that you can turn into sandwich loaves, hamburger and hot dog buns, or even cinnamon rolls. Happy baking!
What could be more satisfying than the simple yet magical process of baking your own bread? Baking bread and sharing it with others of course. And this week's Friday Favorites contributor, Kelli Martin Brew, shares her homemade bread in a big way.
Kelli and her family live in the Blue House of the Gainesville Catholic Worker in Florida, one of 150 Catholic Worker communities around the world 'dedicated to living the social dimension of the Gospel by serving and living with the impoverished, struggling for social and economic justice, and working for peace.'
You can read more about they do on the Gainesville Catholic Worker blog, or even follow along with the Gainesville Catholic Worker on Facebook. Kelli, an organic gardener for 25 years and committed locavore, also keeps a personal blog, Our Local Life . . . What We Need Is Here, where she writes about everything from preserving local produce and keeping chickens to Sunday Inspiration and current affairs. I loved this recent post about serving food at the Blue House's 'free café.'

My family lives in a house of hospitality, and our particular mission is to get healthy, delicious food to folks who most need it. We usually bake around 36 loaves of bread a week for guests who come to our 'free café,' and for day laborers with whom we share breakfast each Friday at several local labor pools.

Our challenge is to pack as much nutrition into our bread as we can—while making it soft and tasty enough to seem familiar and attractive to folks who may be used to (and possibly prefer) Wonder bread over whole wheat.
I recently spent some time in Paris visiting my student son (lucky me!) and found myself craving a good, solid, chewy loaf of bread after all the croissants and pains au chocolat I had indulged in. I found just what I was looking for at a fancy-schmancy boulangerie near the Arc de Triomphe.
When I got home, I worked up a recipe that is pretty darn close. I substituted pecans (our local nut) for hazelnuts, but kept the pretty, golden raisins. It’s been a hit!

Kelli's Pain aux Raisins Secs et Noisettes ou Pacanes
(Bread with Golden Raisins and Hazelnuts or Pecans)
Makes 3 to 4 loaves
On special occasions we serve this bread with homemade honey butter, but it's moist enough to be delicious on its own. Because we're always in a hurry, the bread only rises once. We also use Rapid-Rise yeast* to speed along the process. [Editor's note: You can substitute an equal amount of instant yeast and let your dough rise a little longer.]
6 cups whole wheat flour, preferably organic
2 Tablespoons Rapid-Rise yeast*
2 Tablespoons salt
4 Tablespoons sugar
4 cups (32 oz) very warm water
1/2 cup golden raisins
1/2 cup chopped pecans or hazelnuts
1/4 cup flax seeds (optional, but we like to add these when we have them; they're good for you!)
5 - 6 cups white all-purpose flour (this amount may vary), preferably organic
1. Place the whole wheat flour, yeast, salt, and sugar in a large mixing bowl and whisk together.
2. Add the warm water and whisk until the flour is completely incorporated.
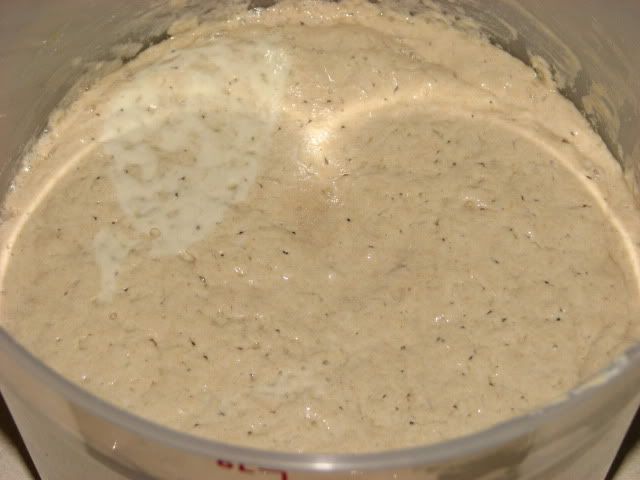
3. Stir in the raisins and nuts (and flaxseed if using).

Before Adding the White Flour
4. Add enough white flour to make a stiff dough; in our humid climate, that's between 5 and 6 cups. It varies, so add just enough so that the dough no longer sticks to your hands.

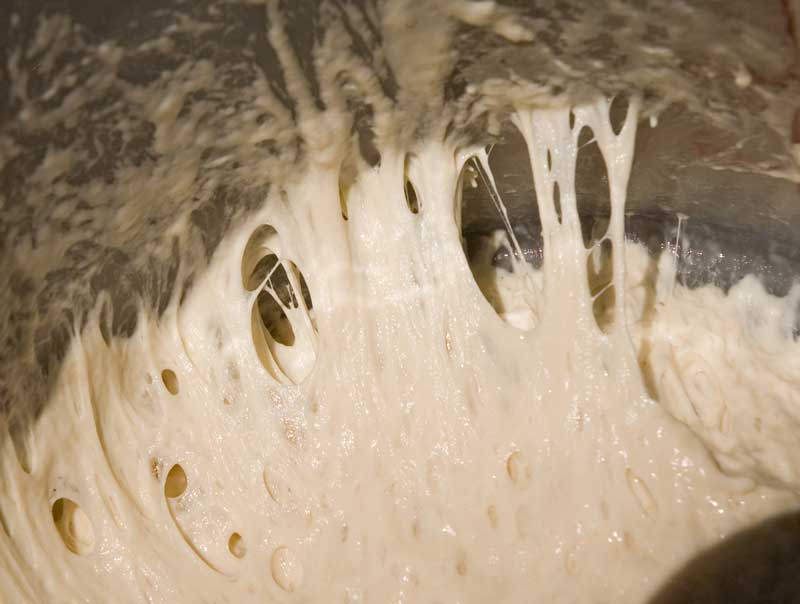
Well Kneaded Dough
5. Knead vigorously for 5 to 10 minutes, additional flour as needed to prevent the dough from sticking.
Telling someone to knead for a certain amount of time seems like giving directions by suggesting one 'walk five minutes and turn left.' It all depends on how quickly you get from point A to point B. With bread, how much dough you’re working with also factors into the equation.
We usually make 12 loaves at a time, and that amount of dough needs a little more work before it’s thoroughly kneaded. So how do you know when it’s ready? Experienced bakers can feel it in their hands, but there’s a great way to double check!


Pinch off a small piece of dough and powder with flour (so your fingers won’t stick). Then slowly flatten and stretch the dough as if you were making a thin pizza crust.

If the dough is well-kneaded, you should be able to poke the stretched dough gently with your finger without tearing the dough. This is the best way I know of to tell when bread dough is ready to move to the next stage.
6. Divide the dough into four pieces (or three if your loaf pans are large), shape them into loaves [see this post for step-by-instructions on how to shape pan loaves], and place them in four greased baking pans. Let rise for 30 minutes.
The climate in our home varies wildly from season to season—warm and in the 80s during the summer, and in the 50s and much drier in the dead of winter. We’ve found the easiest way to make sure our dough rises in a timely and predictable manner (because people are waiting for us) is to place it in a warm oven to rise.
Our oven’s lowest temperature is 170° F, and that seems just right. Just heat up the oven, turn the oven off, then place the bread in to rise. For us, 25 minutes does the trick. [You can read more about bread baking basics, including how to tell when your dough has risen enough, on Susan's Farmhouse White Basic Sandwich Bread Recipe post.]

Risen and Ready to Bake
7. After the loaves have risen, preheat the oven to 350° (take your loaves out if you let them rise in the oven), then place the loaves (back) into the oven when it has heated up. Bake until browned on bottom and top — for us it's about 25 minutes.
8. Remove the loaves from the pans, let them cool on a wire rack, and try your best to wait 30 minutes before slicing into them because the bread continues to bake after you take it out of the oven.
*From Wikipedia: Rapid-Rise yeast is a variety of yeast (usually a form of instant yeast) designed to provide greater carbon dioxide output to allow faster rising at the expense of shortened fermentation times. There is considerable debate as to the value of such a product; while most baking experts believe it reduces the flavor potential of the finished product, Cook's Illustrated magazine, among others, feels that at least for direct-rise recipes, it makes little difference. Rapid-Rise yeast is often marketed specifically for use in bread machines.

Kelli's Pain aux Raisins Secs et Noisettes ou Pacanes
Welcome to Friday Favorites, where A Year in Bread readers guest blog about their best bread recipes. If you bake a Friday Favorites bread at home, we hope you'll come back and share your experiences with us in the comments section of that post. Click here to find out how you can become a Friday Favorites guest blogger, and click here for last week's Friday Favorites recipe: Marielle's versatile, overnight bread dough that you can turn into sandwich loaves, hamburger and hot dog buns, or even cinnamon rolls. Happy baking!
What could be more satisfying than the simple yet magical process of baking your own bread? Baking bread and sharing it with others of course. And this week's Friday Favorites contributor, Kelli Martin Brew, shares her homemade bread in a big way.
Kelli and her family live in the Blue House of the Gainesville Catholic Worker in Florida, one of 150 Catholic Worker communities around the world 'dedicated to living the social dimension of the Gospel by serving and living with the impoverished, struggling for social and economic justice, and working for peace.'
You can read more about they do on the Gainesville Catholic Worker blog, or even follow along with the Gainesville Catholic Worker on Facebook. Kelli, an organic gardener for 25 years and committed locavore, also keeps a personal blog, Our Local Life . . . What We Need Is Here, where she writes about everything from preserving local produce and keeping chickens to Sunday Inspiration and current affairs. I loved this recent post about serving food at the Blue House's 'free café.'

My family lives in a house of hospitality, and our particular mission is to get healthy, delicious food to folks who most need it. We usually bake around 36 loaves of bread a week for guests who come to our 'free café,' and for day laborers with whom we share breakfast each Friday at several local labor pools.

Our challenge is to pack as much nutrition into our bread as we can—while making it soft and tasty enough to seem familiar and attractive to folks who may be used to (and possibly prefer) Wonder bread over whole wheat.
I recently spent some time in Paris visiting my student son (lucky me!) and found myself craving a good, solid, chewy loaf of bread after all the croissants and pains au chocolat I had indulged in. I found just what I was looking for at a fancy-schmancy boulangerie near the Arc de Triomphe.
When I got home, I worked up a recipe that is pretty darn close. I substituted pecans (our local nut) for hazelnuts, but kept the pretty, golden raisins. It’s been a hit!

Kelli's Pain aux Raisins Secs et Noisettes ou Pacanes
(Bread with Golden Raisins and Hazelnuts or Pecans)
Makes 3 to 4 loaves
On special occasions we serve this bread with homemade honey butter, but it's moist enough to be delicious on its own. Because we're always in a hurry, the bread only rises once. We also use Rapid-Rise yeast* to speed along the process. [Editor's note: You can substitute an equal amount of instant yeast and let your dough rise a little longer.]
6 cups whole wheat flour, preferably organic
2 Tablespoons Rapid-Rise yeast*
2 Tablespoons salt
4 Tablespoons sugar
4 cups (32 oz) very warm water
1/2 cup golden raisins
1/2 cup chopped pecans or hazelnuts
1/4 cup flax seeds (optional, but we like to add these when we have them; they're good for you!)
5 - 6 cups white all-purpose flour (this amount may vary), preferably organic
1. Place the whole wheat flour, yeast, salt, and sugar in a large mixing bowl and whisk together.
2. Add the warm water and whisk until the flour is completely incorporated.
3. Stir in the raisins and nuts (and flaxseed if using).

Before Adding the White Flour
4. Add enough white flour to make a stiff dough; in our humid climate, that's between 5 and 6 cups. It varies, so add just enough so that the dough no longer sticks to your hands.

Well Kneaded Dough
5. Knead vigorously for 5 to 10 minutes, additional flour as needed to prevent the dough from sticking.
Telling someone to knead for a certain amount of time seems like giving directions by suggesting one 'walk five minutes and turn left.' It all depends on how quickly you get from point A to point B. With bread, how much dough you’re working with also factors into the equation.
We usually make 12 loaves at a time, and that amount of dough needs a little more work before it’s thoroughly kneaded. So how do you know when it’s ready? Experienced bakers can feel it in their hands, but there’s a great way to double check!


Pinch off a small piece of dough and powder with flour (so your fingers won’t stick). Then slowly flatten and stretch the dough as if you were making a thin pizza crust.

If the dough is well-kneaded, you should be able to poke the stretched dough gently with your finger without tearing the dough. This is the best way I know of to tell when bread dough is ready to move to the next stage.
6. Divide the dough into four pieces (or three if your loaf pans are large), shape them into loaves [see this post for step-by-instructions on how to shape pan loaves], and place them in four greased baking pans. Let rise for 30 minutes.
The climate in our home varies wildly from season to season—warm and in the 80s during the summer, and in the 50s and much drier in the dead of winter. We’ve found the easiest way to make sure our dough rises in a timely and predictable manner (because people are waiting for us) is to place it in a warm oven to rise.
Our oven’s lowest temperature is 170° F, and that seems just right. Just heat up the oven, turn the oven off, then place the bread in to rise. For us, 25 minutes does the trick. [You can read more about bread baking basics, including how to tell when your dough has risen enough, on Susan's Farmhouse White Basic Sandwich Bread Recipe post.]

Risen and Ready to Bake
7. After the loaves have risen, preheat the oven to 350° (take your loaves out if you let them rise in the oven), then place the loaves (back) into the oven when it has heated up. Bake until browned on bottom and top — for us it's about 25 minutes.
8. Remove the loaves from the pans, let them cool on a wire rack, and try your best to wait 30 minutes before slicing into them because the bread continues to bake after you take it out of the oven.
*From Wikipedia: Rapid-Rise yeast is a variety of yeast (usually a form of instant yeast) designed to provide greater carbon dioxide output to allow faster rising at the expense of shortened fermentation times. There is considerable debate as to the value of such a product; while most baking experts believe it reduces the flavor potential of the finished product, Cook's Illustrated magazine, among others, feels that at least for direct-rise recipes, it makes little difference. Rapid-Rise yeast is often marketed specifically for use in bread machines.
Labels: Friday Favorites
Click here to continue reading the post and comments...
posted by Farmgirl Susan at
11:00 PM
2 Comments
![]()
![]()