


Friday Favorites: One dough recipe, many breads...
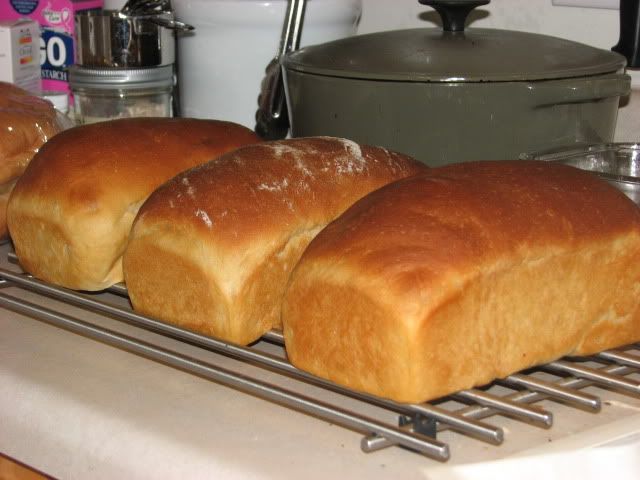
A versatile, overnight bread dough recipe using a sourdough starter that is perfect for sandwich loaves, hamburger rolls, hot dog buns, and even cinnamon rolls!

Welcome to our delicious new series, Friday Favorites, where guest bloggers share their best bread recipes. If you bake a Friday Favorites bread at home, we hope you'll come back and share your experiences with us in the comments section of that post. Click here to find out how you can become a Friday Favorites guest blogger, and click here for last week's Friday Favorites recipe, Anne's Oatmeal Toasting Bread. Happy baking!
This week's guest is Marielle, who writes about fabric arts, parenting, homeschooling, and, of course, food at maricucu.
A note from Marielle: These instructions are pretty long and detailed, but the process itself is quite simple and easy to do. I have three children 5 years old and under, and I don't have an abundance of time. If you can read a recipe, you, too, can make this bread!
Here's my routine:
1. Take out starter, weigh sponge ingredients, dump and mix. Go to sleep.
2. Mix dough before breakfast and let it rest while I eat.
3. Knead dough, let it rise.
4. Shape, pan and let it rise again.
5. Bake, cool and store.
You will need to have a sourdough starter already on hand—I used this easy tutorial to make mine.
I've been baking bread for quite a while—ever since I picked up a packet of yeast forgotten in my mother's pantry when I was a teenager. Nothing brings out the oohs and ahhs from nonbakers like the yeasty whiff of fresh bread. But I never strayed from same day bread. No poolish, biga or sponge recipes for me. I avoided sourdough recipes like the plague.
Then, a couple of years ago in an effort to offer something a bit more healthful to my young kids and husband, I ordered Laurel's Bread Book and read it from cover to cover. I was sold, whole wheat all the way! Yeahhhhh, not so much. I produced 100% whole wheat, slightly bitter, slightly fluffy bricks. Healthful as all get out but bricks nonetheless. So I put away the book and went back to buying whole wheat bread from the store.
Fast forward to this year when I developed an interest in growing my own starter. I know, you're probably thinking, A total green-behind-the-ears-with-regards-to-sourdough thinks she can grow her own starter? What can I say except that ignorance is bliss? I found the tutorial and wonderful method on breadtopia and actually had a growing starter in days, a thriving one in a few weeks. But how would I use it?
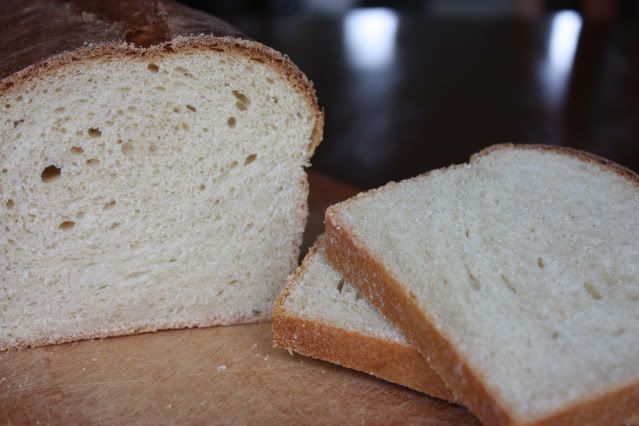
Another google search and I found Sourdough Mike and his conversion spreadsheet. One evening after the kids had gone to sleep and I finally had my brain cells to myself, I tweaked King Arthur's Classic Sandwich Bread to include a portion of white whole wheat as well as my now bountiful starter. The outcome was delicious—a hearty light wheat bread with a substantial yet tender crumb. My family loved it so much I started making hamburger buns from the same dough, and in a fit of inspiration, cinnamon rolls. Oh yes, cinnamon rolls.
Basic Dough (makes one loaf)
Adapted from King Arthur Classic Sandwich Loaf
300 grams of starter - (I'll show you how to make this from your measly 1/2 cup of fridge starter)
70 grams whole milk
230 grams unbleached all purpose flour - (My all purpose flour is naturally high in protein so it's more along the lines of a bread flour. If you're buying a flour at the grocery store, buy bread flour.)
1¼ teaspoons table salt
2 tablespoons of honey/sugar/brown sugar/maple syrup - (I use honey but you can use whatever you'd like)
4 Tablespoons butter/oil - (I usually use canola oil but sometimes do butter.)
2 teaspoons instant dry yeast - (I use SAF brand that I get in bulk at BJs)
Note: You'll notice that my bread recipe uses both sourdough starter AND yeast. Most sourdough purists would revoke my membership and whip me with a wet noodle for muddying the recipe with yeast. Truth is I could make the recipe without yeast but it would involve a much longer rise time (about 4-5 hours for each rising period) and time alas is short around here. Fortunately by letting a sponge ferment overnight I still get the benefit of a cool rise that builds flavor and just use the yeast the next day to speed up the last two phases.
First let's build the sponge. Doing an overnight soak with the starter will soften the bran in the white wheat flour, get a jump start on gluten formation and improve the bread's taste as well as shelflife. All that for being lazy! About that white wheat flour. White whole wheat flour IS whole wheat but since it's ground from a lighter wheat berry, the flavor is a bit more mild and the texture a bit more refined than traditional whole wheat flour.
The night before I bake bread I stir the starter down and weigh it all out except for about 2 tablespoons. Pour that in the bowl (I use a dough bucket). Then feed the 2 tablespoons of starter that's left in the jar 75g of water and 65g flour. Stir and put back in the fridge. It's ready to hibernate until next week.
Back to the starter in the bowl/bucket. Since I make 5 loaves at a time I need more starter than I have after I've fed it that morning. The great thing about The Borg, aka the starter is that it's insidious. A little bit of starter will colonize a whole bowl of flour/water mix in just a few hours producing a bowlful of starter. So I subtract the starter's weight from what I need. Do a little math, subtract the starter's weight from the 300g.
Since starter is equal parts flour and water, add half water and half flour of the remaining weight needed. Sounds complicated but it's not. You'll likely have 130 grams of starter but you need 300 grams total. You'll need an additional 170 grams. Just add another 85 grams of water and 85 grams of white whole wheat flour then stir. See? Simple.
Now for this recipe I also add the milk to make the batter a bit more fluid and easier to stir the next day. Stir again and cover loosely. Air is necessary for the yeast to multiply. Leave it on the counter and remind your family that the bubbling mix the counter IS NOT trash and if they want to eat they need to keep their hands and toys off (that might only be necessary around my home).
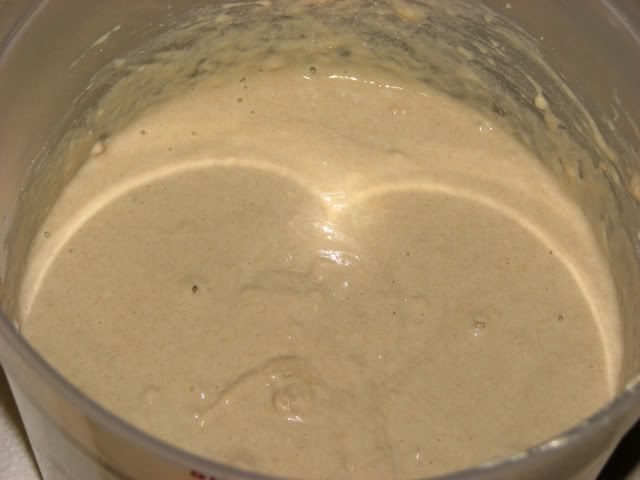
So you've been snoozing and that hardworking starter has been digesting enzymes all night long while aligning the gluten strands to make some amazing bread. I'd say the trouble of feeding it has been well worth it. My dogs don't do anything for me in return for the food they get. They're just cute and bark loud when the mailman drops by. Lovely huh? The sponge will look like this in the morning.
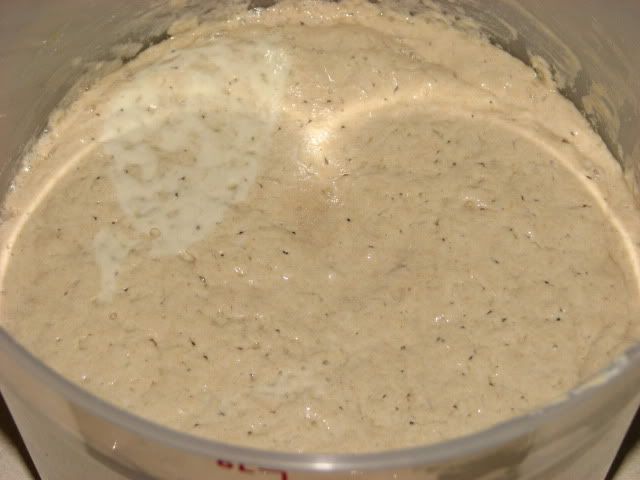
If I had used white all-purpose flour instead of whole wheat the growth would have been even higher so be sure to leave enough room for the starter to expand. Nothing like waking up to your starter oozing out of its jar like some scene out of The Stuff. Stir down the sponge. I use a butter knife to stir because it's easier than a spoon but one day I'm going to buy this Danish dough whisk just for the job. Now add the honey, salt, yeast and oil. Stir it well. The oil will want to separate but just keep stirring, it will eventually incorporate.
Add about 3/4 of the flour in the recipe. At some point the dough may be too stiff for your utensil so just dig in with your hands. Continue adding flour until the dough is just slightly sticky but still holds together. Instead of kneading, cover the mix and set it aside for 20 minutes. Why? Because flour doesn't hydrate instantly. If you were to add enough flour for the dough to be smooth right now you'd end up with a dry crumbly dough later on as the flour absorbs the moisture slowly. If you let it rest (this step is called autolyse) then the flour will hydrate and your dough will be much easier to knead later.
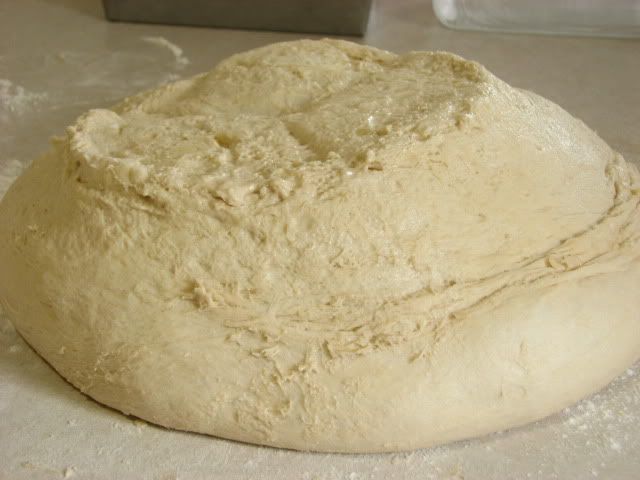
When the dough has rested, dump it out and knead for 6-8 minutes or until it smooths out, is just barely sticky and forms a smooth ball. Put the dough back in the bucket and let it rise until doubled for 1 to 1 1/2 hours depending on your room temperature. The dough is ready for shaping when a floured finger poked into the top does not fill back in or fills in slowly. Dump out the dough and press out the air bubbles with your fingertips.
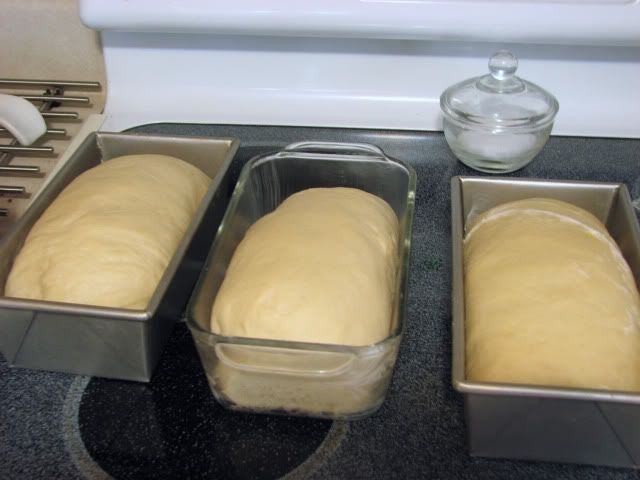
You want to flatten it evenly and then roll it into a log for the loaves. Pinch the ends to seal and place in a well greased loaf pans. My favorites are the Chicago Metallic ones onthe left but I also use the pyrex ones when I need more than two loaves.

For the hamburger buns I press the dough out into a large circle about an inch thick. Cut out buns with a 3-inch cookie cutter and set on a parchment lined baking sheet. I don't like rerolling dough so I just cut them very close together and when they rise, they will round out. No need for perfection. The taste of homemade bread is the artistry. Let the dough rise covered (or like me in the oven with the light on for warmth) for another 1 to 1/2 hours until doubled. The same finger poke test works well to test the dough for doubling.
Preheat the oven to 350 degrees and remember to take out the bread if you let it rise in the oven. Bake the loaves for 30-35 minutes and the buns for approximately 25 minutes. Some say the bread loaves are done when they sound hollow if thumped underneath. I take the temperature and it's done when the internal temperature is 190 degrees. Take the loaves out of the pan and let them cool before slicing.
I hope you enjoyed our family's favorite everyday bread recipe. I have more detailed instructions on my blog, including lots more photos and instructions on making the cinnamon rolls here:
Bread Baking Day Part 1
Bread Baking Day Part 2
Cinnamon Rolls
Previous Friday Favorites:
Anne's Oatmeal Toasting Bread
Knead more bread? Check our recipe index for links to all the recipes posted on A Year in Bread.
This week's guest is Marielle, who writes about fabric arts, parenting, homeschooling, and, of course, food at maricucu.
A note from Marielle: These instructions are pretty long and detailed, but the process itself is quite simple and easy to do. I have three children 5 years old and under, and I don't have an abundance of time. If you can read a recipe, you, too, can make this bread!
Here's my routine:
1. Take out starter, weigh sponge ingredients, dump and mix. Go to sleep.
2. Mix dough before breakfast and let it rest while I eat.
3. Knead dough, let it rise.
4. Shape, pan and let it rise again.
5. Bake, cool and store.
You will need to have a sourdough starter already on hand—I used this easy tutorial to make mine.
I've been baking bread for quite a while—ever since I picked up a packet of yeast forgotten in my mother's pantry when I was a teenager. Nothing brings out the oohs and ahhs from nonbakers like the yeasty whiff of fresh bread. But I never strayed from same day bread. No poolish, biga or sponge recipes for me. I avoided sourdough recipes like the plague.
Then, a couple of years ago in an effort to offer something a bit more healthful to my young kids and husband, I ordered Laurel's Bread Book and read it from cover to cover. I was sold, whole wheat all the way! Yeahhhhh, not so much. I produced 100% whole wheat, slightly bitter, slightly fluffy bricks. Healthful as all get out but bricks nonetheless. So I put away the book and went back to buying whole wheat bread from the store.
Fast forward to this year when I developed an interest in growing my own starter. I know, you're probably thinking, A total green-behind-the-ears-with-regards-to-sourdough thinks she can grow her own starter? What can I say except that ignorance is bliss? I found the tutorial and wonderful method on breadtopia and actually had a growing starter in days, a thriving one in a few weeks. But how would I use it?
Another google search and I found Sourdough Mike and his conversion spreadsheet. One evening after the kids had gone to sleep and I finally had my brain cells to myself, I tweaked King Arthur's Classic Sandwich Bread to include a portion of white whole wheat as well as my now bountiful starter. The outcome was delicious—a hearty light wheat bread with a substantial yet tender crumb. My family loved it so much I started making hamburger buns from the same dough, and in a fit of inspiration, cinnamon rolls. Oh yes, cinnamon rolls.
Basic Dough (makes one loaf)
Adapted from King Arthur Classic Sandwich Loaf
300 grams of starter - (I'll show you how to make this from your measly 1/2 cup of fridge starter)
70 grams whole milk
230 grams unbleached all purpose flour - (My all purpose flour is naturally high in protein so it's more along the lines of a bread flour. If you're buying a flour at the grocery store, buy bread flour.)
1¼ teaspoons table salt
2 tablespoons of honey/sugar/brown sugar/maple syrup - (I use honey but you can use whatever you'd like)
4 Tablespoons butter/oil - (I usually use canola oil but sometimes do butter.)
2 teaspoons instant dry yeast - (I use SAF brand that I get in bulk at BJs)
Note: You'll notice that my bread recipe uses both sourdough starter AND yeast. Most sourdough purists would revoke my membership and whip me with a wet noodle for muddying the recipe with yeast. Truth is I could make the recipe without yeast but it would involve a much longer rise time (about 4-5 hours for each rising period) and time alas is short around here. Fortunately by letting a sponge ferment overnight I still get the benefit of a cool rise that builds flavor and just use the yeast the next day to speed up the last two phases.
First let's build the sponge. Doing an overnight soak with the starter will soften the bran in the white wheat flour, get a jump start on gluten formation and improve the bread's taste as well as shelflife. All that for being lazy! About that white wheat flour. White whole wheat flour IS whole wheat but since it's ground from a lighter wheat berry, the flavor is a bit more mild and the texture a bit more refined than traditional whole wheat flour.
The night before I bake bread I stir the starter down and weigh it all out except for about 2 tablespoons. Pour that in the bowl (I use a dough bucket). Then feed the 2 tablespoons of starter that's left in the jar 75g of water and 65g flour. Stir and put back in the fridge. It's ready to hibernate until next week.
Back to the starter in the bowl/bucket. Since I make 5 loaves at a time I need more starter than I have after I've fed it that morning. The great thing about The Borg, aka the starter is that it's insidious. A little bit of starter will colonize a whole bowl of flour/water mix in just a few hours producing a bowlful of starter. So I subtract the starter's weight from what I need. Do a little math, subtract the starter's weight from the 300g.
Since starter is equal parts flour and water, add half water and half flour of the remaining weight needed. Sounds complicated but it's not. You'll likely have 130 grams of starter but you need 300 grams total. You'll need an additional 170 grams. Just add another 85 grams of water and 85 grams of white whole wheat flour then stir. See? Simple.
Now for this recipe I also add the milk to make the batter a bit more fluid and easier to stir the next day. Stir again and cover loosely. Air is necessary for the yeast to multiply. Leave it on the counter and remind your family that the bubbling mix the counter IS NOT trash and if they want to eat they need to keep their hands and toys off (that might only be necessary around my home).

So you've been snoozing and that hardworking starter has been digesting enzymes all night long while aligning the gluten strands to make some amazing bread. I'd say the trouble of feeding it has been well worth it. My dogs don't do anything for me in return for the food they get. They're just cute and bark loud when the mailman drops by. Lovely huh? The sponge will look like this in the morning.
If I had used white all-purpose flour instead of whole wheat the growth would have been even higher so be sure to leave enough room for the starter to expand. Nothing like waking up to your starter oozing out of its jar like some scene out of The Stuff. Stir down the sponge. I use a butter knife to stir because it's easier than a spoon but one day I'm going to buy this Danish dough whisk just for the job. Now add the honey, salt, yeast and oil. Stir it well. The oil will want to separate but just keep stirring, it will eventually incorporate.
Add about 3/4 of the flour in the recipe. At some point the dough may be too stiff for your utensil so just dig in with your hands. Continue adding flour until the dough is just slightly sticky but still holds together. Instead of kneading, cover the mix and set it aside for 20 minutes. Why? Because flour doesn't hydrate instantly. If you were to add enough flour for the dough to be smooth right now you'd end up with a dry crumbly dough later on as the flour absorbs the moisture slowly. If you let it rest (this step is called autolyse) then the flour will hydrate and your dough will be much easier to knead later.
When the dough has rested, dump it out and knead for 6-8 minutes or until it smooths out, is just barely sticky and forms a smooth ball. Put the dough back in the bucket and let it rise until doubled for 1 to 1 1/2 hours depending on your room temperature. The dough is ready for shaping when a floured finger poked into the top does not fill back in or fills in slowly. Dump out the dough and press out the air bubbles with your fingertips.

You want to flatten it evenly and then roll it into a log for the loaves. Pinch the ends to seal and place in a well greased loaf pans. My favorites are the Chicago Metallic ones onthe left but I also use the pyrex ones when I need more than two loaves.

For the hamburger buns I press the dough out into a large circle about an inch thick. Cut out buns with a 3-inch cookie cutter and set on a parchment lined baking sheet. I don't like rerolling dough so I just cut them very close together and when they rise, they will round out. No need for perfection. The taste of homemade bread is the artistry. Let the dough rise covered (or like me in the oven with the light on for warmth) for another 1 to 1/2 hours until doubled. The same finger poke test works well to test the dough for doubling.

Preheat the oven to 350 degrees and remember to take out the bread if you let it rise in the oven. Bake the loaves for 30-35 minutes and the buns for approximately 25 minutes. Some say the bread loaves are done when they sound hollow if thumped underneath. I take the temperature and it's done when the internal temperature is 190 degrees. Take the loaves out of the pan and let them cool before slicing.

I hope you enjoyed our family's favorite everyday bread recipe. I have more detailed instructions on my blog, including lots more photos and instructions on making the cinnamon rolls here:
Bread Baking Day Part 1
Bread Baking Day Part 2
Cinnamon Rolls
Previous Friday Favorites:
Anne's Oatmeal Toasting Bread
Knead more bread? Check our recipe index for links to all the recipes posted on A Year in Bread.
Labels: Friday Favorites
posted by kitchenmage at
11:59 PM
![]()
![]()

2 Comments:
What a great idea for this great blog ... and starting with this terrific post is going to make it a bit daunting for potential guest bloggers ....
Thanks, everyone
Joanna
For those of us who don't have a scale to measure ingredients in grams, could we have some measurements listed in cups? That would be very helpful, because without which, this bread isn't going to happen in my house!
Post a Comment
<< Home